Secure emails with Apple Mail
Apple Mail uses the Mac OS X keychain to store your private key and certificates. A keychain is a file that contains security credentials that is protected by Mac OS X. Every account has a keychain called "login", which is unlocked when the user logs in. To keep things simple, we will store our keys and certificates in that default "login" keychain.
Start the Keychain Access program, which can be found in the /Applications/Utilities folder.

Choose the File → Import Items menu item.

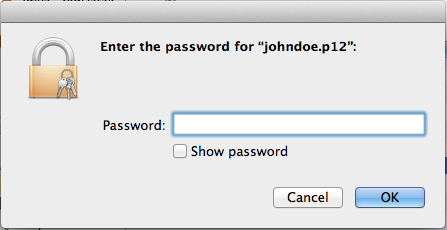
Select the PKCS#12 file (.p12) containing your private key and associated certificates; set the Destination Keychain to be the "login" keychain; and select "Open".
When prompted, enter the password used to protect the private key in the PKCS#12 file.
Step 2: Get familiar with the keychain
This step if optional. Go to step 3 if you are eager to send your first signed email. But come back to learn how to manage the certificates that you get from other people.
Viewing the keychain
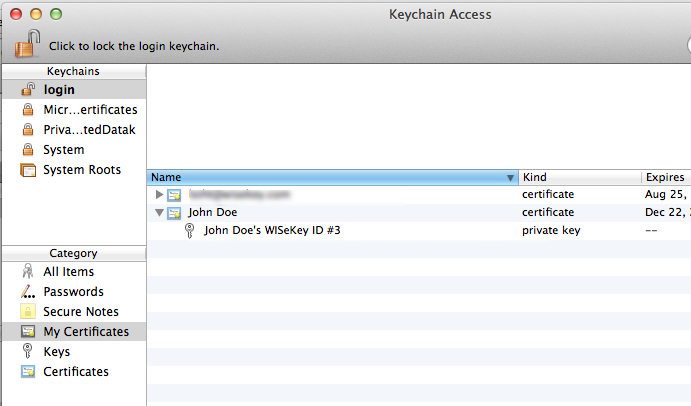
After importing your private key and associated certificates into the "login" keychain, and can be seen as separate items in that keychain. Use the categories on the left side of the Keychain Access window to restrict which the items to show (or select the All Items category to show them all).
In the following, make sure you have selected the "login" keychain.
The My Certificates category shows certificates that have corresponding private keys. Here you will see your imported certificate, and the corresponding private key can be revealed.
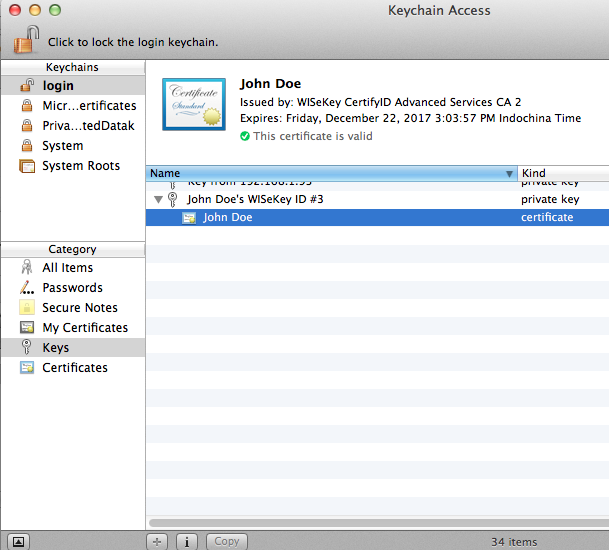
The Keys category shows private keys in the keychain. Clicking on the reveal triangle shows the certificate corresponding to the private key.
You can change the name of the private key by selecting it and choosing File > Get Info . This only affects how KeyChain Access displays the private key, so it doesn't matter what it is called.
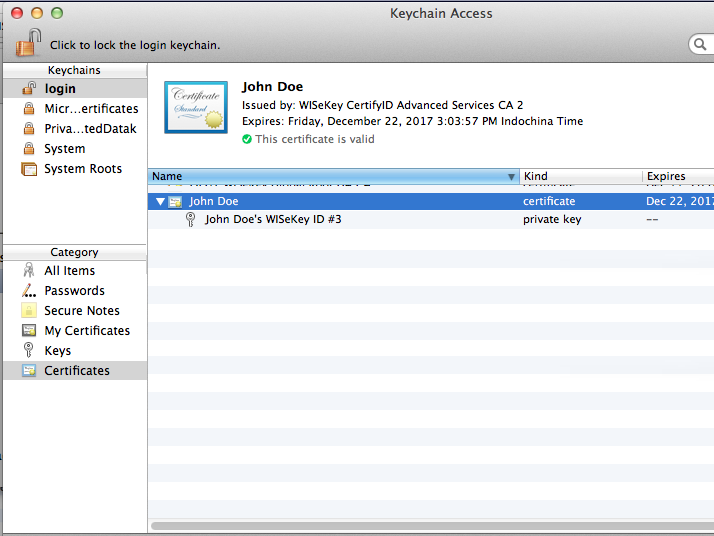
The Certificates category shows certificates in the keychain. This shows all the certificates in the keychain, the ones with corresponding private keys (i.e. your certificates) and the ones without corresponding private keys (i.e. other people's certificates).
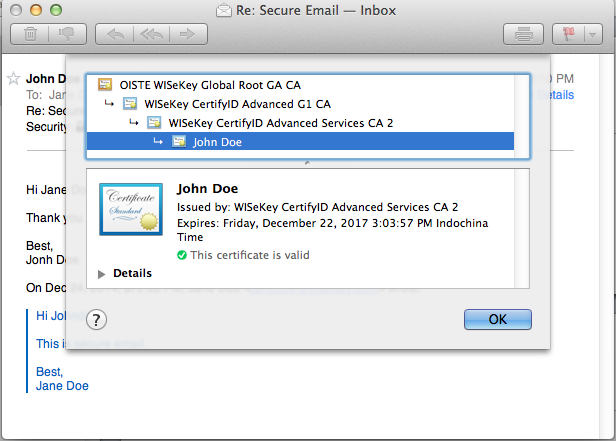
In this example, my certificate is called "John Doe", and the certificate that signed it "WISeKey CertifyID Advanced Services CA 2", and the root certificate that signed it "OISTE WISeKey Global Root GA CA" are shown.
Other people's certificates can also be seen here. Initially, there probably won't be many other certificates. If you use Apple Mail and receive signed emails from other people, their certificates will automatically be added to the login keychain so that they can be used to send encrypted emails to those people..
Under the View menu, select "Show Expired Certificates" to also show certificates which have expired. By default, these are hidden. Remember this option for the future, for when you have expired certificates that you want to remove from your keychain in your keystore.
Managing your key-pairs
I recommend keeping only one set of email credentials. Apple Mail automatically selects the private key to use for signing emails. It does not allow you to select which one to use. So when there is only one key-pair there won't be any confusion about which one it will use.
The only time it might be useful to have multiple key-pairs in the keychain is when your have new key-pairs, but want to be able to decrypt emails encrypted using the an old-key pair. Either the sender did not know you have changed key-pairs, or you are looking at an old email. In this situation, you can either temporily make the old key-pair available in the keychain and then remove it, or have the old key-pair in the keychain along with the new key-pair and hope that Apple Mail will never select the wrong key for signing new emails. Ideally, Apple Mail will choose the key based on expiry and issuing times, but it is not clear whether it actually works that way.
To see if there are more than one key-pair for a particular email address, run this command:
security find-identity -p smime -s johndoe@wisekey.com This command just lists the matching key-pairs. It does not indicate which one Apple Mail will choose to use.
Managing other people's certificates
It is important to manage the certificates in the login keychain, because many problems are caused by having the wrong certificates in the keychain. For example, if there are more than one certificate for an email address, the wrong one might be used to encrypt emails. This is likely to happen when people start experimenting with S/MIME and are experimenting with different certificates, as well as during normal use when they renew their certificates.
Be familiar with the certificates in the login keychain, so that you can spot and delete any certificates which should not be there. Keep the keychain tidy by deleting certificates that are no longer useful: such as those that have expired, their email address has changed, or for people that you no longer want to send encrypted emails to.
Common problems: Not deleting everything
To delete an item from the keychain, select it and press the delete key.
You have to delete a private key and its corresponding certificate in two separate operations. Deleting the certificate does not automatically delete its private key (even though it might be nested underneath the certificate in the My Certificates or Certificates category). Take note of the name of the corresponding item, so that you delete the correct one, since their names might not be very obvious.
You might also want to delete the certificates in your certificate chain if you no longer need them. For example, if you are changing from one certificate provider to another.
Step 3: Sending a signed email
Start the Apple Mail application. If it is already running, quit it and start it again, so that it will detect the new credentials in your keychain.
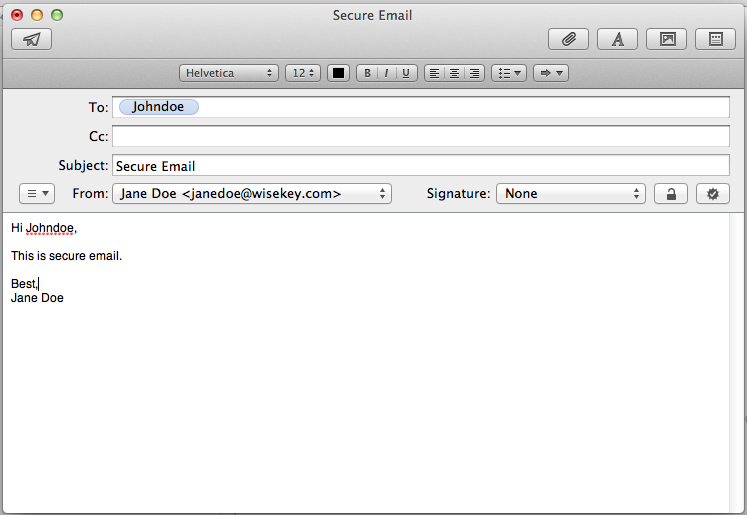
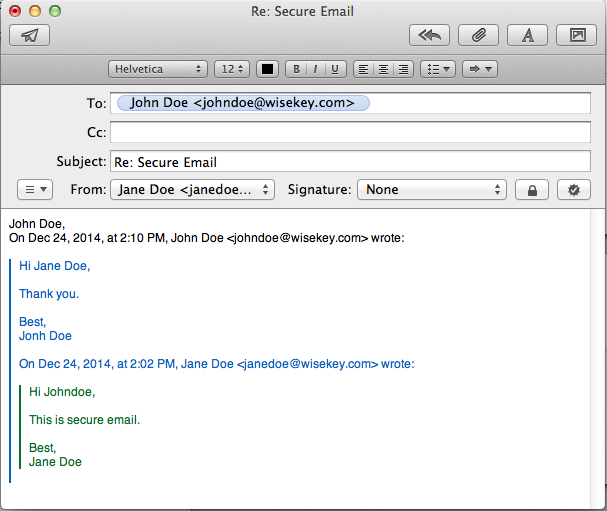
Compose a new message.
When there is a private key and certificate in your keychain that matches the email address of the sender configured in Apple Mail, two new icons appear to control encryption and signing. If these are not present, check that the correct private key and certificate are in the keychain. Make sure the email address in the certificate exactly match the email address configured in the Apple Mail account. Note: the text to the left of the "@" character is case sensitive.
Click on the signing icon (the seal) so that it becomes a tick mark.
The encryption icon (the padlock) is probably grayed out, because you do not yet have a certificate for the receiver.
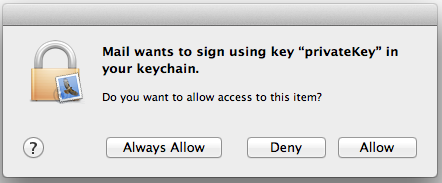
Click the send button. The system will ask you for permission to let the Mail application use the private key to sign the email.
Clicks the Allow button and the email is signed and sent.
With this email the receiver will get your public certificate, so they can then send you back a signed and encrypted email (assuming they have their own set of credentials).
Step 4: Receiving a signed and encrypted email
Get the receiver to send you back a signed and encrypted email, and then open Apple Mail to receive that email.
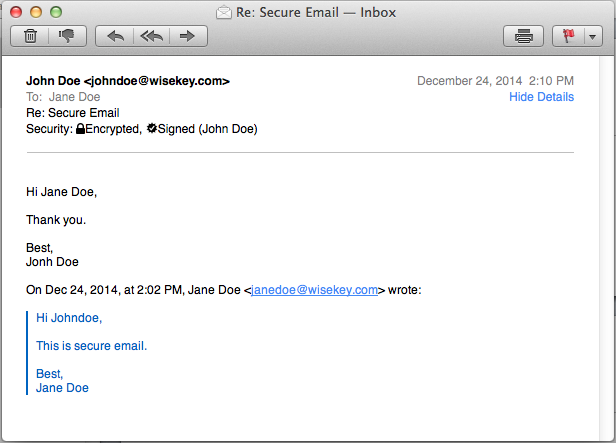
Double click on the email to show it in its own window so that the security header can be seen. Alternatively, turn on View > Message > Long Headers.
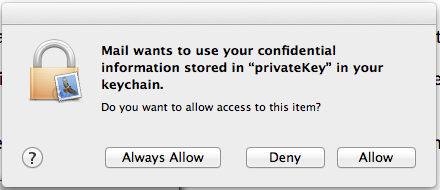
The Mac will ask you for give Apple Mail permission to use the private key to decrypt the email message. Allow it.
The decrypted email is displayed. The security header shows that the message was encrypted (the padlock) and signed (the seal). If the message has not been tampered with, the seal is intact.
Click on the seal icon in the security header to bring up details about the signing certificate. This information can help you determine if the holder of the corresponding private key is really someone you really trust.
Apple Mail automatically saves a copy of the signing certificate into your login keychain, so you can now send them an encrypted email.
Step 5: Sending a signed and encrypted email
Send another email.
This time, the encryption padlock icon is enabled because the certificate for the receiver is now in your keychain.
If you get a MFMessageErrorDomain error 1035 error, try quitting from both Apple Mail and Keychain Access and try again.
Security controls
These are the possible options for sending signed and/or encrypted emails.


Errors
If an email message cannot be decrypted, it will appear like this:

This occurs if you deny Apple Mail the permission to use the private key, or if the private key is not in your keychain. You might encounter this if you have renewed your key-pair and have removed the old key-pair from your keychain. Keep a backup copy of the PKCS#12 file handy (and remember the password), so that you can reload it if it is ever needed.
If the digital signature cannot be validated or verified, the message will appear like this:
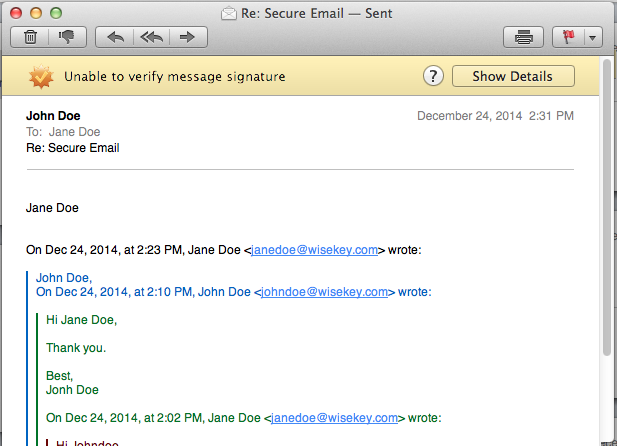
This occurs if the message does not match the signature. The message might have been forged, was tampered with, or was corrupted. It can also occur if the signing certificate is not trusted.
Related Articles
Secure email messages by using a digital signature - Microsoft Outlook 2010
By digitally signing a message, you apply your unique digital mark to the message. The digital signature includes your certificate and public key. This information proves to the recipient that you signed the contents of the message and not an ...Get a FREE digital ID
1 Introduction This document is an user guide on how to use WISeKey WISeID Account to sign up/sign in/verify email and obtain free digital identities. 2 Steps 2.1 Signup Go to https://account.wiseid.com/signup Enter your information Click on Sign Up. ...Import Personal Certificate - Firefox
Step 1: Open Firefox browser and open Application menu at the top right of the page, then click on Settings. Step 2: Go to the Privacy & Security and scroll down to Certificates section then click on the View Certificates… button. Step 3: Your ...IIS8, 8.5 SSL Certificates CSR Creation
How to create a CSR on Windows Server 2012 - IIS 8 and Windows Server 2012 R2 - IIS 8.5 From the Start menu, click or search for Internet Information Services (IIS) Manager and open it. Click on the server name. From the center menu, double-click the ...Apache Wisekey SSL Certificate Installation
If you have not yet created a Certificate Signing Request (CSR) and ordered your certificate on the Wisekey RA platform, see how to generate a OpenSSL CSR for Apache. Apache Server SSL Certificate Installation When you have received your Wisekey ...