IIS 8 and IIS 8.5 SSL Wisekey Certificate Installation
SSL Certificate Installation in Microsoft IIS 8 and IIS 8.5
When you have created a Certificate Signing Request(CSR) and ordered your certificate on our RA platform at the following url link: https://reseller.certifyid.com, you are ready to install your wisekey SSL certificate.
After Wisekey issues your SSL certificate, you will first need to install it to the server from which the certificate request was generated.
How to install and configure your SSL Certificate on Windows Server 2012 - IIS 8 and Windows Server 2012 R2 – IIS 8.5 (Single Certificate)
Open the file containing your certificate. Save the file named your_domain_name.cer to the desktop of the web server you are securing.
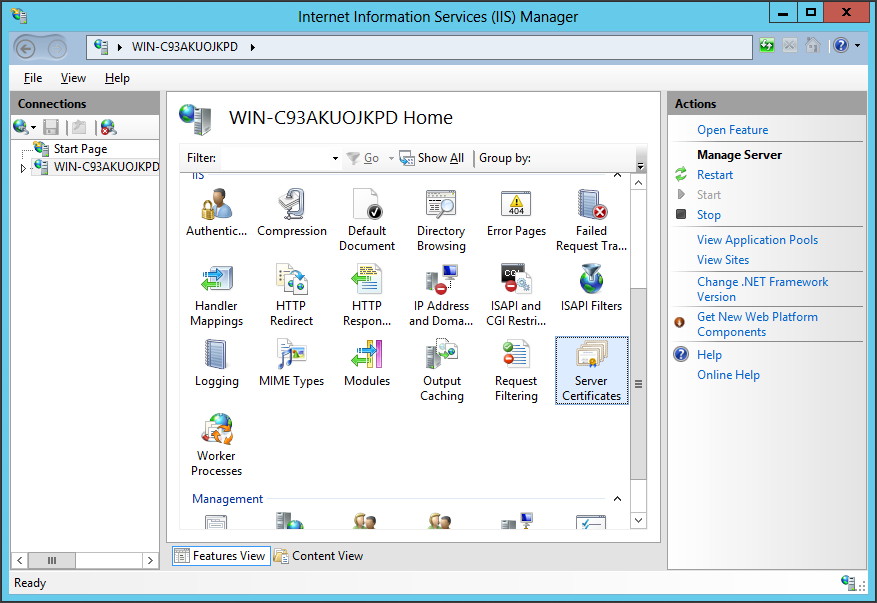
From the Start screen, click or search for Internet Information Services (IIS) Manager and open it.
Click on the server name.
From the center menu, double-click the "Server Certificates" button in the "IIS" section (it is in the middle of the menu).
From the "Actions" menu (on the right), click on "Complete Certificate Request..." This will open the Complete Certificate Request wizard.

Browse to your_domain_name.cer file that was provided to you by Wisekey. You will then be required to enter a friendly name. The friendly name is not part of the certificate itself, but is used by the server administrator to easily distinguish the certificate. Choose to place the new certificate in the Personal certificate store.
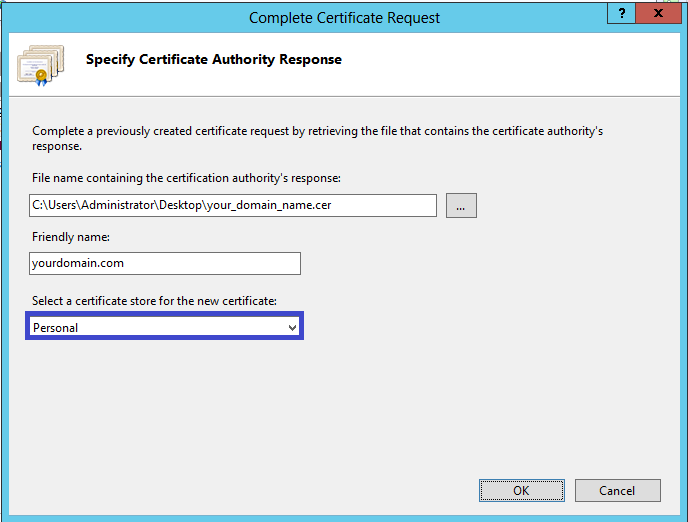
Clicking "OK" will install the certificate to the server.
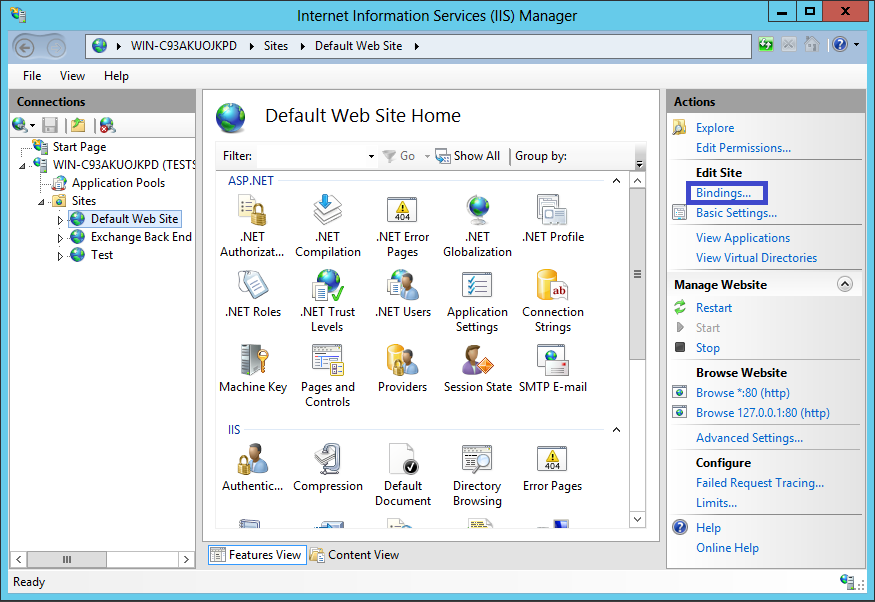
Once the SSL Certificate has been successfully installed to the server, you will need to assign that certificate to the appropriate website using IIS.
From the "Connections" menu in the main Internet Information Services (IIS) Manager window, select the name of the server to which the certificate was installed.
Under "Sites," select the site to be secured with SSL.
From the "Actions" menu (on the right), click on "Bindings..." This will open the "Site Bindings" window.
In the "Site Bindings" window, click "Add..." This will open the "Add Site Binding" window.
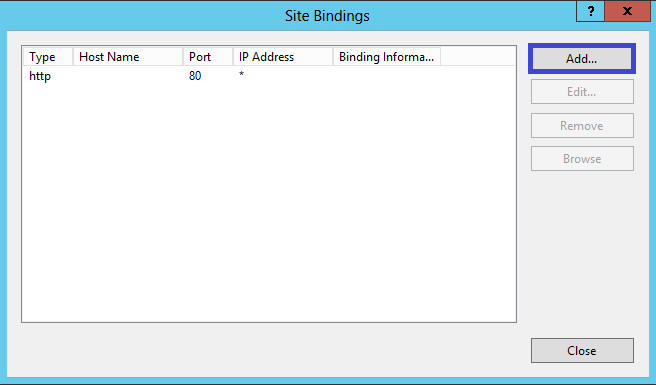
Under "Type" choose https. The IP address should be the IP address of the site or All Unassigned, and the port over which traffic will be secured by SSL is usually 443. The "SSL Certificate" field should specify the certificate that was installed.
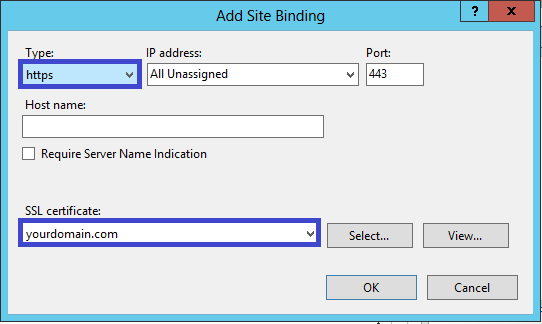
Click "OK." Your SSL certificate is now installed, and the website configured to accept secure connections.
Related Articles
Apache Wisekey SSL Certificate Installation
If you have not yet created a Certificate Signing Request (CSR) and ordered your certificate on the Wisekey RA platform, see how to generate a OpenSSL CSR for Apache. Apache Server SSL Certificate Installation When you have received your Wisekey ...Exchange 2013 Wisekey SSL Installation
SSL Certificate Installation for Exchange 2013 If you have not yet created a Certificate Signing Request (CSR) and ordered your certificate, check the CSR creation process first. Please use this tutorial to install your Wisekey SSL UC certificate. ...IIS8, 8.5 SSL Certificates CSR Creation
How to create a CSR on Windows Server 2012 - IIS 8 and Windows Server 2012 R2 - IIS 8.5 From the Start menu, click or search for Internet Information Services (IIS) Manager and open it. Click on the server name. From the center menu, double-click the ...APACHE CSR Creation
How to generate a CSR for Apache using OpenSSL Login to your server via your terminal client (ssh). At the prompt, type: openssl req -new -newkey rsa:2048 -nodes -keyout server.key -out server.csr where server is the name of your server. This begins ...Import Personal Certificate - Mac
Go to the place where your file was saved then double click to open it You must enter the password of your certificate Next, enter the password of system account then click on modify Keychain Search Keychain then click on Keychain access View your ...